Here is part 2 of the "95 Jetta runs terrible" story. The symptoms were very strange - not only would the
engine nearly stall at idle, but when I gave it some gas to raise the RPMs, the engine would lose power
in a cyclic manner. The RPMs would raise, but then fall back down to idle again and then raise back up.
You could have the gas pedal almost floored, and the engine would just drop right back down to idle.
Driving the car with the throttle in the same position for more than a second or two would result in
a sudden and complete loss of power for a couple of seconds and then it would surge back to life. The
throttle position sensor (TPS) seemed like a good place to start troubleshooting.
The way to start testing is at the ECU harness. In my case, pins 33, 40, and 41 in the ECU connector
are for the throttle position sensor. The Bentley manual describes what you should get for readings
across the various pins, so refer to it (as always) and perform the tests at the ECU connector. To
make it easier, find something to use for test pins to slide into the contacts in the ECU connector.
The leads on most multimeters won't fit in there very well on their own. Here is a closeup of a couple
of small pieces of copper wire core that I used:

I performed the various resistance checks across the appropriate pins, and got open
circuits everywhere (no continuity). The next move is to perform the same tests at the sensor itself.
If you get different results at the sensor itself, then that would indicate a wiring or connection problem
somewhere between the sensor and the ECU. The connector on the sensor is easy to get at and remove, it's
located on the throttle body, facing the front of the engine bay as seen here:

The connector removed:

I obtained exactly the same readings at the sensor itself - all open circuits. I was excited to have
found the cause of the problem; however, I was not looking forward to buying a new sensor (the best
deal I found was almost $90, and many places are getting $130). My dad talked me into opening up the
sensor and investigating things further, as potentiometer devices like this are usually very simple.
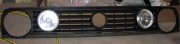
The first order of business was to remove the throttle body. Four allen bolts hold it to the intake
manifold. Here is my throttle body removed, you can see the throttle position sensor is held in place
by a couple of small torx bolts:

Whenever you have the throttle body removed, it's a good idea to clean up the inside of it. Make sure
to get rid of all the junk built up around the butterfly valve itself - you'll have to hold the throttle
open while cleaning it. Here's mine before cleaning, your's will probably look similar:

Before cleaning, I removed the throttle position sensor. There's an o-ring in there that should be
replaced if it isn't still in nice shape. Here is my throttle body after cleaning, and the throttle
position sensor removed:

Here is a closeup of the cleaned up throttle body:

I used a dremel to open up the top of the throttle position sensor, and once it was done I could tell what the
problem was. Here is what the sensor looks like inside:

That white plastic piece mates with the throttle body, and it turns as the throttle is opened and closed.
There are small metal contacts (little fingers) mounted to the plastic piece, which ride along carbon tracks.
The carbon tracks vary in thickness so that the resistance of the connection changes as they move along. In
my case, the metal fingers simply were not making contact with the carbon tracks. It appeared that simply
bending them down a little bit would do the trick. That center white piece will pop right out:

You can see the metal fingers a little better in the picture above, and it was easy to adjust them (though
they are very delicate). While I had the sensor apart, I cleaned up the carbon tracks with a q-tip and then
applied an extremely thin layer of dielectric silicone grease. To reattach the piece I had cut out of the
sensor body, I used some heavy duty rubber cement (the stuff that dries into a hard, rubbery substance) and
then wrapped it in duct tape. I would have used JB Weld or Foxy Poxy or whatever, but I didn't have any
on hand. This method worked pretty well, though it's not the prettiest:

So that's how I fixed the failing throttle position sensor in our 95 Jetta. Now the sensor checks out
perfectly according to the test procedures in the Bentley shop manual. Once I reinstalled the sensor and
throttle body, the car ran just fine again. It still has a little bit of a rough idle, just like it has
ever since I've owned it. I'm not sure I'll ever find out what's causing that.
Post your comments below. Please note that your comments will not be visible until
they have been approved by a moderator (me).
Date: 08/04/06, 11:20:00 PDT
From: john
Comments: great job, this info and pictures was just what I needed to fix my code
Date: 12/28/06, 12:23:48 PST
From: kevin
Comments: Excellent job. I've always theorised that this could be done, I am so glad someone finally had the balls to do it
Date: 09/07/11, 21:44:47 PDT
From: sohail
Comments: hi, the problem u mentioned above is exactly what i am having with my 2000 jetta vr6 and the shop told me that i have to change the throttle body .... they did not mention the sensor at all .... i just cant afford the expansive throttle body for now so it just parked until next pay check... any advise ... is its the body itself or could be the sensor. thanks