As I mentioned in my
last post,
I have been rebuilding an ACN code 020 transmission to swap into our
Mk2 Golf.
I did not document tearing down this transmission, because my last post documented tearing down an A3
transmission and the procedure is practically identical. Once the unit was disassembled, I was
pleasantly surprised to see that all of the synchros were good, all of the bearings were good, and
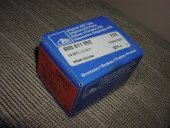
there was no damage to any of the gears. The parts for the rebuild consisted almost entirely of
seals and gaskets. Even the large pinion shaft bearing was nice and smooth, with no play whatsoever -
and that is pretty unusual. I think this unit may have been rebuilt in the past, because I'm certain
that it did not come out of a low mileage car (none of our parts cars were low mileage).
Most of the time I put into this unit was in sand blasting (technically, glass bead blasting) the
aluminum case pieces. They came out pretty nice, as you can see here:

The first picture below shows the differential and pinion shaft installed in the case. The second
picture shows the input shaft installed. The third picture shows the 1st through 4th shift forks
installed:


Assembling the two case halves can be tricky if you are not replacing the large input shaft bearing. The
official procedure is to press the bearing into the upper (or rear) case half, and then install the case
halves so that the input shaft presses into the bearing. If you want to reuse your existing bearing then
you would have to pull it off without damaging it first, and that can be tricky. I wanted to reuse the
bearing without pulling it off first, so I tried a trick using the bearing plate to help press the bearing
into the upper case half while assembling the two halves. In the first picture below, you can see the
case halves partially together, which I accomplished by heating up the upper housing with a torch, then
tapping it down onto the bearing (don't pound hard, it could damage the bearing!). I had made sure to
roughly line up the bearing plate before installing the second case half, so that I could then use some
very long metric bolts of the appropriate size and thread to draw the bearing plate up close enough to
be able to install the correct screws (those four inset triple-square screws), which you can see in the
second picture below. That method worked pretty well. The third picture below shows the case halves
assembled and the driven 5th gear in place on the pinion shaft.


Unfortunately, I didn't take a picture of the drive 5th gear (on the input shaft) being installed, but
it really is just the opposite of taking it off. Press it into place (may need some gentle tapping with
a rubber mallet) and get the shift fork back into place so that you can engage both 5th gear and reverse
gear at the same time. You will need to manually move the shift forks to do that, which means you
can't have the selector shaft installed just yet. The first picture below shows the shift forks
through the reverse light switch hole in the selector shaft housing (later transmissions don't have
this hole, FYI) - the fork on each end needs to be pressed down. This will allow you to correctly
torque the hollow input shaft bolt on the end of the drive 5th gear. You may need a friend to help.

Now the selector shaft can be installed. The first picture below shows the selector shaft installed,
with a new seal in place. The second picture shows the installation of the selector shaft cover.
Don't forget that big spring that goes in there. The tool I'm using here is just a bolt with a 27mm
hex head with a couple of nuts jammed against each other. Jamming the nuts probably wouldn't be quite
good enough for removing this plate - welding them onto the bolt would be the way to go. This tool
can also be used for the timing plug in the top of the bell housing.


Now you can adjust the 5th gear shift forks. The first picture below shows me measuring between the
top of the threaded rod and the shift fork. That measurement should be 5mm (or 0.2 inches). In this
picture, I still have some adjusting to do - I am measuring about 0.1 inches.

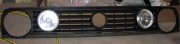
In the picture below, you can see the 5th gear housing installed. Don't forget to install your throwout
bearing.

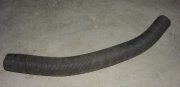
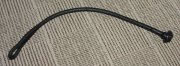
Now is also a good time to replace the clutch rod bushing and clutch rod oil seal (actually, the best
time would be just before you install the 5th gear housing). The bushing is very
important - a worn bushing will cause a new seal to start leaking pretty quickly. My bushing was
totally shot. It was worn to the same inside diameter as the rest of the input shaft pushrod bore.
When they get that worn, you cannot push them out from the back like the book recommends without doing
something to plug up that hole first. The easiest way is to get a thread tap that will fit the worn
ID of the bushing and cut threads so you can install a bolt to plug the hole. You can now either
rig up something as a slide-hammer against the bolt you put in, or just whack it out from the back
like the book says to. In the first picture below, you can see the trashed bushing I removed along with the tap I used to
cut the threads. The second picture shows the new bushing about to be installed. Drive it back until
it seats against the smaller inside diamater of the input shaft. The oil seal gets installed in front
of the bushing, sitting back roughly 0.5mm from the end of the shaft.


And here is the end result. I didn't cover the installation of the drive flanges, mainly because I didn't
take pictures of that... but it really is straightforward. If you removed them, you know how to install
them. I installed a Peloquin 80% limited slip upgrade while I was installing these flanges, which
included new flange seals, inner flange caps, brass rings, and good instructions. Well worth the price
at just under $100 (for a kit that does both sides). The stock limited slip is 20%, so it will be
interesting to see what kind of difference I notice.

Post your comments below. Please note that your comments will not be visible until
they have been approved by a moderator (me).
Date: 05/14/07, 18:10:49 PDT
From: Matt
Comments: I am doing a clutch on a 94 golf with an 020 and have the following question:
To replace the clutch rod bushing can I just pull the rod out (have nothing fall apart inside the still together transmission), replace the bushing, then just slide the rod back in?
Your site is awesome... wish I had the time to document the stuff like this.
Thanks in advance for your help,
Matt
Date: 05/15/07, 05:22:33 PDT
From: max
Comments: Hi Matt - yes, that is correct. The clutch pushrod is not holding anything together inside the transmission, so you can completely remove it with no worries. Good luck, and thanks for the feedback!